

Tuesday, July 10, 2012

Wednesday, July 4, 2012
DIY Container Irrigation System

If you are anything like me you might forget to water the garden and plants every so often. And by every so often I mean that Jeremy spends more time asking me if I watered the garden and plants than I actually spend watering. When he suggested an irrigation tool to help me limit how many times I’d have to water the tomatoes we planted in our bucket containers I was all about it.
SUPPLIES
Bucket
Lunch Meat Containers
Drill
¾” PVC Pipe
Soil
Plant
PREP WORK
 Grab one of those lunch meat containers that you have lying
around your kitchen and drill some holes into the sides and top, turning it
into a colander. You might have to use small
bits and work up to ¼” like we did since the plastic is so soft. This is going
to be your water reservoir. The holes are going to allow water to enter the
container and essentially feed water to the plant from the bottom up.
Grab one of those lunch meat containers that you have lying
around your kitchen and drill some holes into the sides and top, turning it
into a colander. You might have to use small
bits and work up to ¼” like we did since the plastic is so soft. This is going
to be your water reservoir. The holes are going to allow water to enter the
container and essentially feed water to the plant from the bottom up. 
Drill a drainage hole into the side of the bucket, level
with the top of the water reservoir. This hole acts as a guide to make sure the
plant isn’t overwatered. When watering the plant, the water level inside will
reach the height of the hole and seep out, letting you know you’ve added enough.
Next cut a piece of PVC pipe. The piece should be the length
from the top of the water reservoir to just above the top of the bucket. The PVC
pipe is used to get the water to the reservoir directly.
Since your water reservoir is holding the water delivered by
the PVC pipe you won’t have to water your plant every day. Depending on how hot
your summers are you can skip 2 or 3 days between watering your plant. The soil
around the reservoir will actually draw the water up to the plant roots. Neat
stuff right?
PUTTING IT TOGETHER
You don’t need anything fancy to keep your pieces in place.
Some lightly packed soil will do the trick. Place the water reservoir in the center of the
bucket and the bottom of the PVC pipe opposite and level with the drainage hole.
Scoop the soil in and it all should stay in place. If it is still loose, pack the
soil a little by hand. When the bucket
is ¾ of the way full with soil, add your plant. If you are transplanting from a
container like we did, remember to separate the roots a bit before placing the
plant in the soil. Add more soil to keep the plant in place and you’ve put
together a nifty container irrigation system.


MAKING IT WORK
The last step is getting the water into the water reservoir.
Take your hose and fill the PVC pipe slowly by just barely opening the hose
valve. Give it time to drain so that the top of the plant doesn’t become
flooded. It will take a few minutes before you see water seep out the hole on
the side of the bucket. Note: it will be water seepage. I was expecting a
stream of water out of the hole but as Jeremy pointed out, the water isn’t
under pressure so nothing spectacular here.


Linked up: Yesterday on Tuesday
Monday, July 2, 2012
DIY Painted Bucket Planter

When you are given two tomato plants and have nowhere to plant them you can decide to turn up the creative vibes in the garden and create a colorful planter out of buckets, paint and tape! Follow along for an inexpensive project to give a pop of color to your garden.

SUPPLIES
Bucket or twoRust-Oleum Painter’s Touch spray paint
Sand Paper (emery paper works best on plastic)
Painter’s TapeSoil for container planting
Plant
PREP WORK

 For the buckets you can visit your neighborhood bagel or
donut shop and ask if they have any spare ones. There's a chance they throw them
away so they don’t mind giving them to their favorite customers for free. Lightly
sand the entire exterior of the buckets to remove that glossy look and help
bond the paint. If you are using Rust-Oleum Painter’s Touch that bonds to
plastic there is no need to primer your buckets. If you are using a paint that
does not bond to plastic try Rust-Oleum spray primer before painting. Be sure
to let the primer dry completely before continuing. Note: We primed our buckets
before we bought our paint so we ended up with primed buckets and paint that
bonded to plastic. Oops! Try not to make this mistake or you’ll end up with
peeling paint when you remove the painter’s tape.
For the buckets you can visit your neighborhood bagel or
donut shop and ask if they have any spare ones. There's a chance they throw them
away so they don’t mind giving them to their favorite customers for free. Lightly
sand the entire exterior of the buckets to remove that glossy look and help
bond the paint. If you are using Rust-Oleum Painter’s Touch that bonds to
plastic there is no need to primer your buckets. If you are using a paint that
does not bond to plastic try Rust-Oleum spray primer before painting. Be sure
to let the primer dry completely before continuing. Note: We primed our buckets
before we bought our paint so we ended up with primed buckets and paint that
bonded to plastic. Oops! Try not to make this mistake or you’ll end up with
peeling paint when you remove the painter’s tape.BE CREATIVE

Decide on the look you want – vertical stripes, horizontal stripes, two colors or three? We went with vertical stripes and chose summer squash, granite and lagoon as our color palette. Using a flexible measuring tool like a seamstress measuring tape, mark where you want your stripes and what color they will be. If you choose vertical stripes make the marks on the bottom of the bucket so they won’t get lost while painting.
SPRAY & PAINT
After choosing your first color you can paint the entire
bucket or only where you marked out for that color, whichever is easier
depending on your design. Don’t forget to paint on a work surface like
cardboard so you don’t make too big of a mess. Make sure you let the first
color dry at least overnight. Check that the paint is no longer tacky and then
position the painter’s tape over the areas of the bucket that you marked off
for that color. This will give you your first set of stripes. Follow these
directions with the next colors and you will end up with a bucket lined with
painter’s tape and great colors underneath.


THE REVEAL
 When you’ve painted all of your stripes and let them dry,
carefully peel back the painter’s tape to reveal your colorful bucket planter!
If any of the paint peeled away with the tape don’t worry – spray some paint on
cardboard and use a paintbrush to apply it to the bucket. Two coats should do a
great job at covering up any imperfections. If you are a daily waterer drill a few drainage holes in the bottom of the bucket. Now you are ready to plant away!
When you’ve painted all of your stripes and let them dry,
carefully peel back the painter’s tape to reveal your colorful bucket planter!
If any of the paint peeled away with the tape don’t worry – spray some paint on
cardboard and use a paintbrush to apply it to the bucket. Two coats should do a
great job at covering up any imperfections. If you are a daily waterer drill a few drainage holes in the bottom of the bucket. Now you are ready to plant away!
Don't want to water everyday? Come back tomorrow for step by step instructions on the irrigation system we added to our bucket planters.

Tuesday, June 12, 2012
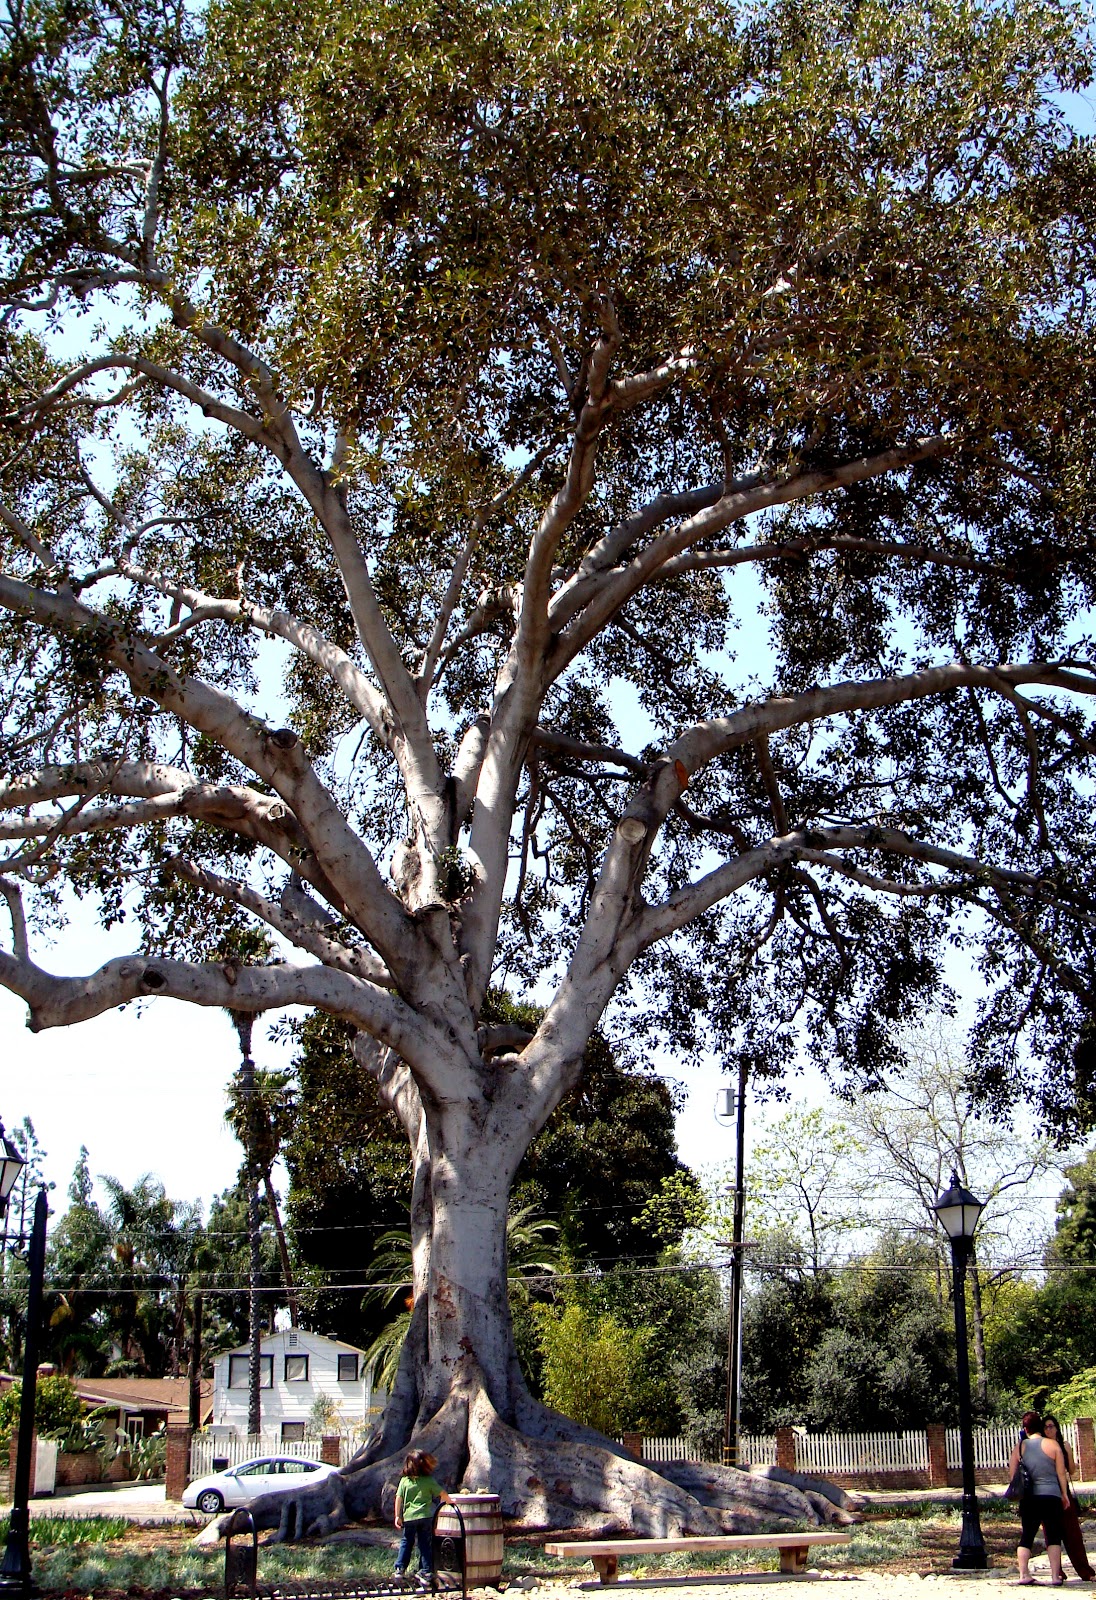
A Place I Live: The Tall Tale of a Fig Tree
 Have you ever been the recipient of multiple stories about
one thing? Lately I have. I’ve heard stories about a monster of a tree that is
said to be over 130 years old. It isn’t just the size of this tree that makes
for a tall tale, but the history too. The Moreton Bay Fig Tree that stands at
400 N. West Street was Anaheim’s first Landmark Tree. According to the Anaheim
Libraries web site the tree was brought from Australia by Anaheim’s first
nurseryman, Timothy Carroll and planted in the late 1800s.
Have you ever been the recipient of multiple stories about
one thing? Lately I have. I’ve heard stories about a monster of a tree that is
said to be over 130 years old. It isn’t just the size of this tree that makes
for a tall tale, but the history too. The Moreton Bay Fig Tree that stands at
400 N. West Street was Anaheim’s first Landmark Tree. According to the Anaheim
Libraries web site the tree was brought from Australia by Anaheim’s first
nurseryman, Timothy Carroll and planted in the late 1800s.
The more recent story I’ve been told is that Walt Disney
used the tree as a model for the Swiss Family Robinson Tree House at
Disneyland. It is quite the enormous tree so I can see how it would make a
fantastic tree to live in. Story has it that the family was given entrance for
life to Disneyland for allowing Disney to use the tree as inspiration.
Yesterday we attended an Anaheim Hi Neighbor celebration
event for the community gardens at Founder’s Park, also the site of the fig
tree. Both Jeremy and I were pretty excited that attendees were invited to take
home sprigs of the giant fig tree, propagated from the fruit it bears. I’m sure
we’ll have to wait a few decades before our little sprigs give us shade, but we
aren’t in any hurry. Who knows, maybe in 130 years there will be some tall
tales about our Moreton Bay Fig Tree.


Friday, June 1, 2012


Subscribe to:
Posts (Atom)